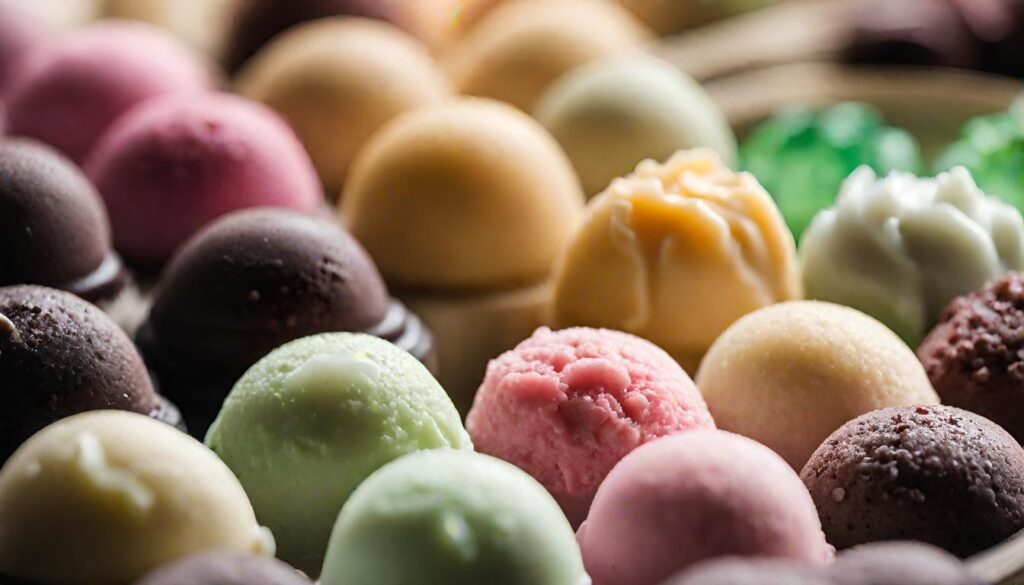
Embark on a culinary journey that blends the chewy perfection of mochi with the icy goodness of ice cream. Mochi ice cream, a delightful fusion of textures and flavors, has taken the dessert world by storm. In this article, we unveil the top 15 mochi ice cream varieties, each promising a taste experience that transcends the ordinary.
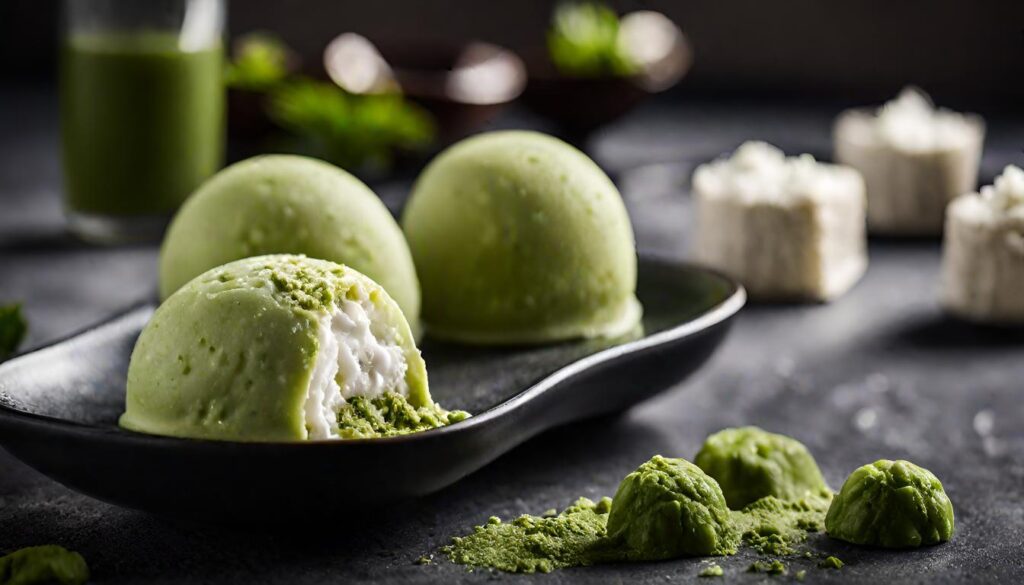
Recipe 1. Classic Matcha Mochi Ice Cream
Start your mochi adventure with the timeless classic – Matcha Mochi Ice Cream. The earthy undertones of matcha perfectly complement the chewy exterior, creating a harmonious blend of Japanese flavors.
Ingredients
For the Matcha Mochi Dough:
- 1 cup glutinous rice flour
- 1/4 cup matcha powder
- 1/2 cup sugar
- 3/4 cup water
- Cornstarch for dusting
For the Ice Cream Filling:
- 2 cups vanilla ice cream (pre-made)
- 2 tablespoons matcha powder
Optional Garnish:
- Toasted sesame seeds
- Honey drizzle
- Edible flowers
Step-by-Step Instructions
Step 1: Creating Matcha Mochi Dough
- Combine glutinous rice flour, matcha powder, and sugar in a mixing bowl.
- Gradually add water while stirring continuously to form a smooth batter.
- Transfer the mixture to a heat-resistant dish and steam for approximately 20 minutes until it solidifies.
- Once cooled, dust your hands with cornstarch, and shape the dough into small, round portions.
Step 2: Preparing the Ice Cream Filling
- Allow vanilla ice cream to soften at room temperature.
- Gently fold in matcha powder until evenly distributed, creating a velvety green hue.
- Place the matcha-infused ice cream in the freezer to firm up.
Step 3: Assembling the Matcha Mochi Ice Cream
- Take a piece of matcha mochi dough and flatten it in your palm, ensuring it is dusted with cornstarch.
- Scoop a small amount of matcha ice cream onto the center of the mochi.
- Carefully encase the ice cream with the mochi, sealing the edges to form a ball.
- Repeat until all mochi and ice cream are used.
- Place the mochi ice cream balls in the freezer for at least 2 hours to set.
Step 4: Optional Garnish
- Before serving, roll the matcha mochi ice cream in toasted sesame seeds for added texture.
- Drizzle with honey for a touch of sweetness.
- Garnish with edible flowers to enhance the visual appeal.
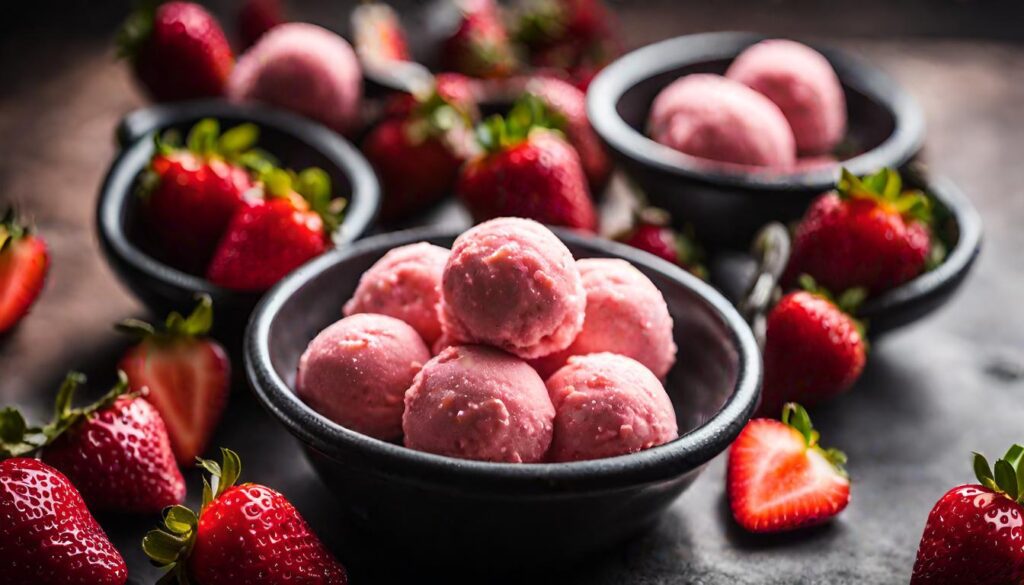
Recipe 2. Strawberry Sensation Mochi Ice Cream
Experience the burst of sweetness with Strawberry Sensation Mochi. Each bite features a luscious strawberry core encased in a soft mochi shell, offering a delightful contrast of textures.
Ingredients
For the Strawberry Mochi Dough:
- 1 cup sweet rice flour
- 1/4 cup strawberry puree
- 1/3 cup sugar
- 1/2 cup water
- Cornstarch for dusting
For the Strawberry Filling:
- 2 cups fresh strawberries, finely diced
- 1/4 cup sugar
- 1 tablespoon cornstarch
Optional Garnish:
- Powdered sugar
- Fresh mint leaves
- Chocolate drizzle
Step-by-Step Instructions
Step 1: Creating Strawberry Mochi Ice Cream Dough
- In a mixing bowl, combine sweet rice flour, strawberry puree, sugar, and water.
- Stir the mixture thoroughly until it forms a smooth batter.
- Transfer the batter into a heat-resistant dish and steam for about 15 minutes until it becomes firm.
- Allow the strawberry mochi dough to cool before dusting your hands with cornstarch and shaping it into small, round portions.
Step 2: Preparing the Strawberry Filling
- In a saucepan, combine diced strawberries, sugar, and cornstarch.
- Cook the mixture over medium heat until it thickens, creating a luscious strawberry filling.
- Allow the filling to cool to room temperature.
Step 3: Assembling the Strawberry Mochi Delight
- Take a portion of strawberry mochi dough and flatten it in your palm, ensuring it is dusted with cornstarch.
- Spoon a small amount of strawberry filling into the center of the mochi.
- Carefully encase the filling with the mochi, sealing the edges to form a delightful ball.
- Repeat the process until all mochi and filling are used.
- Place the strawberry mochi delights in the refrigerator for at least 1 hour to set.
Step 4: Optional Garnish
- Before serving, dust the strawberry mochi delights with powdered sugar for an extra touch of sweetness.
- Garnish with fresh mint leaves to enhance the aroma and presentation.
- Optionally, drizzle a bit of chocolate for a decadent finishing touch.
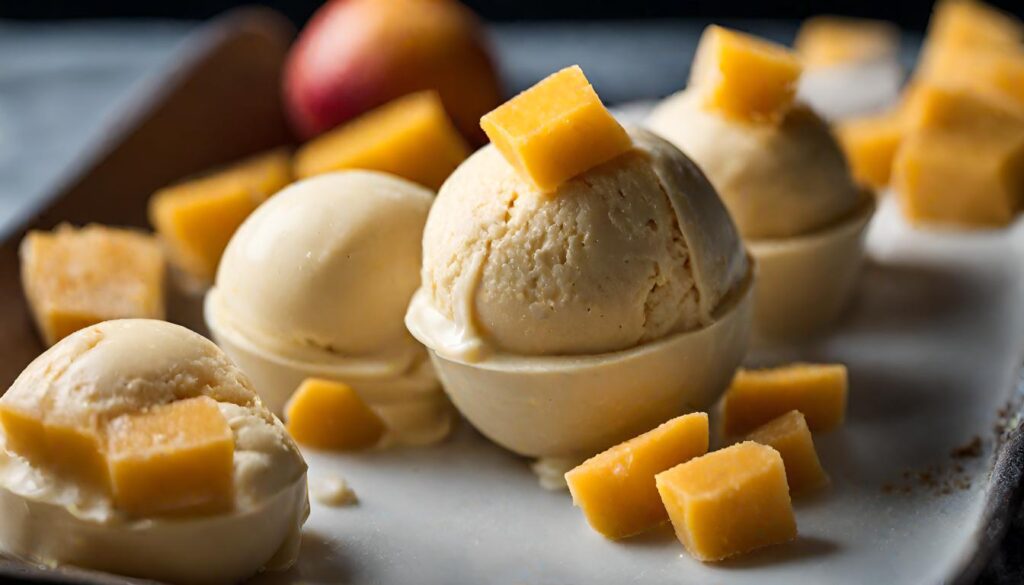
Recipe 3. Mango Tango Mochi Ice Cream
Transport your taste buds to the tropics with Mango Tango Mochi Ice Cream. The vibrant mango filling combined with the chewiness of mochi creates a tropical paradise in every bite.
Ingredients
For the Mango Mochi Ice Cream Dough:
- 1 cup sweet rice flour
- 1/2 cup mango puree
- 1/4 cup sugar
- 1/2 cup water
- Cornstarch for dusting
For the Mango Filling:
- 2 ripe mangoes, diced
- 1/3 cup sugar
- 1 tablespoon lime juice
Optional Garnish:
- Shredded coconut
- Mint leaves
- Drizzle of condensed milk
Step-by-Step Instructions
Step 1: Crafting Mango Mochi Ice Cream Dough
- Combine sweet rice flour, mango puree, sugar, and water in a mixing bowl.
- Stir the mixture thoroughly until a smooth batter forms.
- Transfer the batter to a heat-resistant dish and steam for approximately 20 minutes until it solidifies.
- Allow the mango mochi dough to cool before dusting your hands with cornstarch and shaping it into small, round portions.
Step 2: Preparing the Mango Ice Cream Filling
- In a saucepan, combine diced mangoes, sugar, and lime juice.
- Cook the mixture over medium heat until the mangoes break down and the filling thickens.
- Let the mango filling cool to room temperature.
Step 3: Assembling Mango Tango Mochi Ice Cream
- Take a portion of mango mochi dough, flatten it in your palm, ensuring it’s dusted with cornstarch.
- Spoon a small amount of mango filling into the center of the mochi.
- Carefully encase the filling with the mochi, sealing the edges to create a delightful mango-filled ball.
- Repeat until all mochi and filling are used.
- Place the Mango Tango Mochi Bliss in the refrigerator for at least 2 hours to set.
Step 4: Optional Garnish
- Before serving, roll the mochi delights in shredded coconut for a tropical touch.
- Garnish with mint leaves to enhance the visual appeal.
- Optionally, drizzle a bit of condensed milk for an extra layer of sweetness.
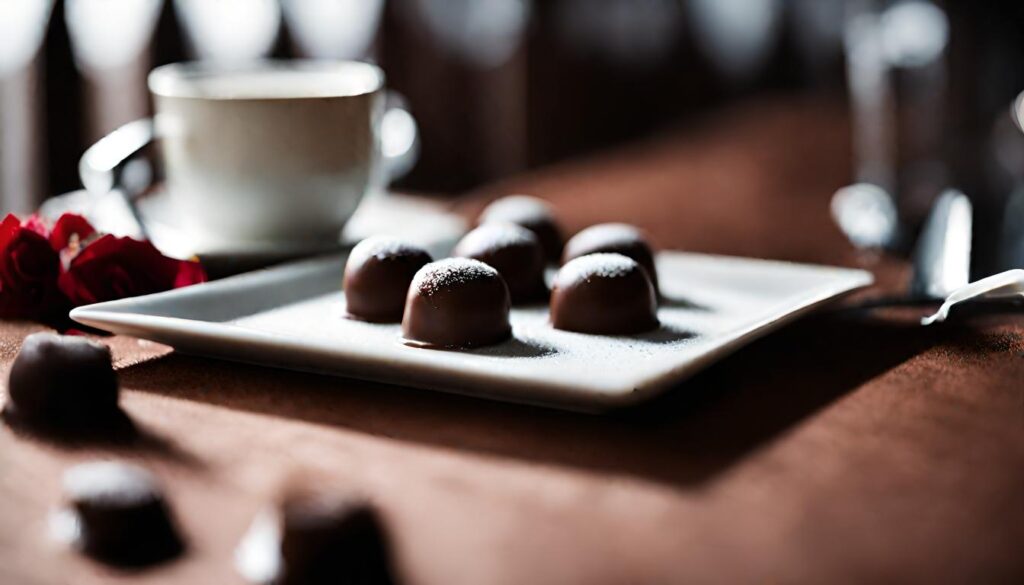
Recipe 4. Chocolate Lover’s Mochi Dream
Indulge your chocolate cravings with Chocolate Lover’s Mochi Ice Cream. Rich chocolate ice cream encased in a velvety mochi layer – a match made in dessert heaven.
Ingredients
For the Chocolate Mochi Ice Cream Dough:
- 1 cup sweet rice flour
- 1/3 cup cocoa powder
- 1/2 cup sugar
- 1/2 cup water
- Cornstarch for dusting
For the Chocolate Filling:
- 1 cup dark chocolate, finely chopped
- 1/2 cup heavy cream
- 2 tablespoons butter
Optional Garnish:
- Crushed nuts
- Powdered sugar
- Drizzle of chocolate ganache
Step-by-Step Instructions
Step 1: Crafting Chocolate Mochi Ice Cream Dough
- Combine sweet rice flour, cocoa powder, sugar, and water in a mixing bowl.
- Stir the mixture thoroughly until a smooth batter forms.
- Transfer the batter to a heat-resistant dish and steam for approximately 20 minutes until it solidifies.
- Allow the chocolate mochi dough to cool before dusting your hands with cornstarch and shaping it into small, round portions.
Step 2: Creating Chocolate Filling
- In a saucepan, heat heavy cream until it begins to simmer.
- Pour the hot cream over the chopped dark chocolate, allowing it to melt.
- Add butter to the chocolate mixture and stir until smooth.
- Let the chocolate filling cool to room temperature.
Step 3: Assembling Chocolate Lover’s Mochi Dream
- Take a portion of chocolate mochi dough, flatten it in your palm, ensuring it’s dusted with cornstarch.
- Spoon a small amount of chocolate filling into the center of the mochi.
- Carefully encase the filling with the mochi, sealing the edges to form a decadent chocolate-filled ball.
- Repeat until all mochi and filling are used.
- Place the Chocolate Lover’s Mochi Dream in the refrigerator for at least 2 hours to set.
Step 4: Optional Garnish
- Before serving, roll the mochi delights in crushed nuts for added texture.
- Dust with powdered sugar to enhance the sweetness.
- Optionally, drizzle a generous amount of chocolate ganache for an extra layer of indulgence.
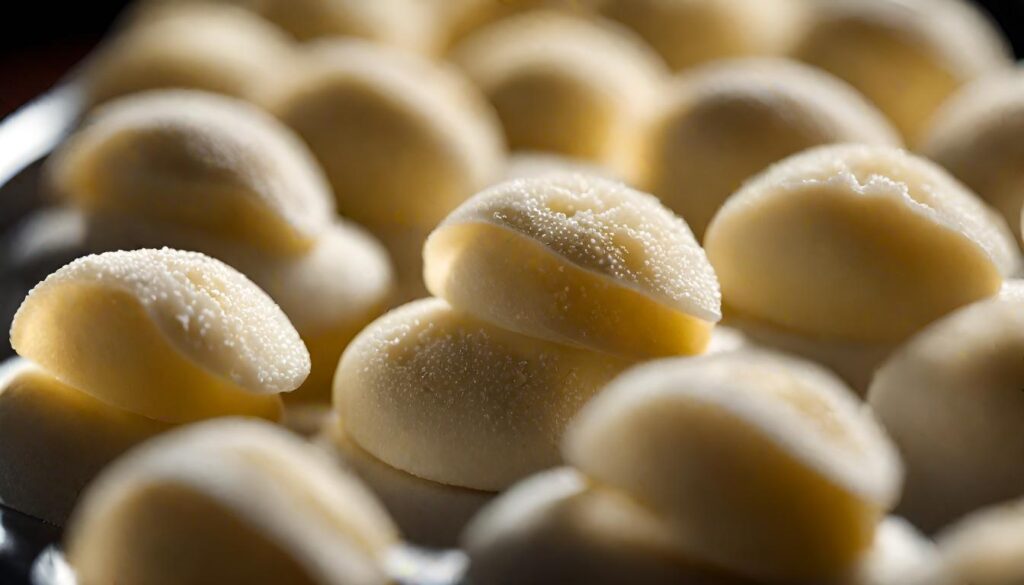
Recipe 5. Vanilla Bean Mochi Elegance
For those who appreciate the simplicity of vanilla, Vanilla Bean Mochi Ice Cream offers a sophisticated treat. The smooth vanilla ice cream within a delicate mochi exterior is pure indulgence.
Ingredients
For the Vanilla Bean Mochi Ice Cream Dough:
- 1 cup sweet rice flour
- 2 tablespoons vanilla extract
- 1/2 cup sugar
- 1/2 cup water
- Cornstarch for dusting
For the Vanilla Bean Filling:
- 1 cup heavy cream
- 2 vanilla beans, scraped
- 1/4 cup powdered sugar
Optional Garnish:
- Edible gold leaf
- Fresh berries
- A dusting of powdered sugar
Step-by-Step Instructions
Step 1: Crafting Vanilla Bean Mochi Ice Cream Dough
- In a mixing bowl, combine sweet rice flour, vanilla extract, sugar, and water.
- Stir the mixture thoroughly until a velvety batter forms.
- Transfer the batter to a heat-resistant dish and steam for approximately 20 minutes until it solidifies.
- Allow the vanilla bean mochi dough to cool before dusting your hands with cornstarch and shaping it into small, round portions.
Step 2: Preparing Vanilla Bean Filling
- In a mixing bowl, whip the heavy cream until soft peaks form.
- Gently fold in the scraped vanilla beans and powdered sugar until well combined.
- Let the vanilla bean filling chill in the refrigerator.
Step 3: Assembling Vanilla Bean Mochi Elegance
- Take a portion of vanilla bean mochi dough, flatten it in your palm, ensuring it’s dusted with cornstarch.
- Spoon a dollop of vanilla bean filling into the center of the mochi.
- Carefully encase the filling with the mochi, sealing the edges to create an elegant vanilla-filled ball.
- Repeat until all mochi and filling are used.
- Place the Vanilla Bean Mochi Elegance in the refrigerator for at least 2 hours to set.
Step 4: Optional Garnish
- Before serving, adorn the mochi delights with edible gold leaf for a touch of opulence.
- Garnish with fresh berries to add a burst of color and freshness.
- Optionally, dust with powdered sugar for an extra layer of sweetness.
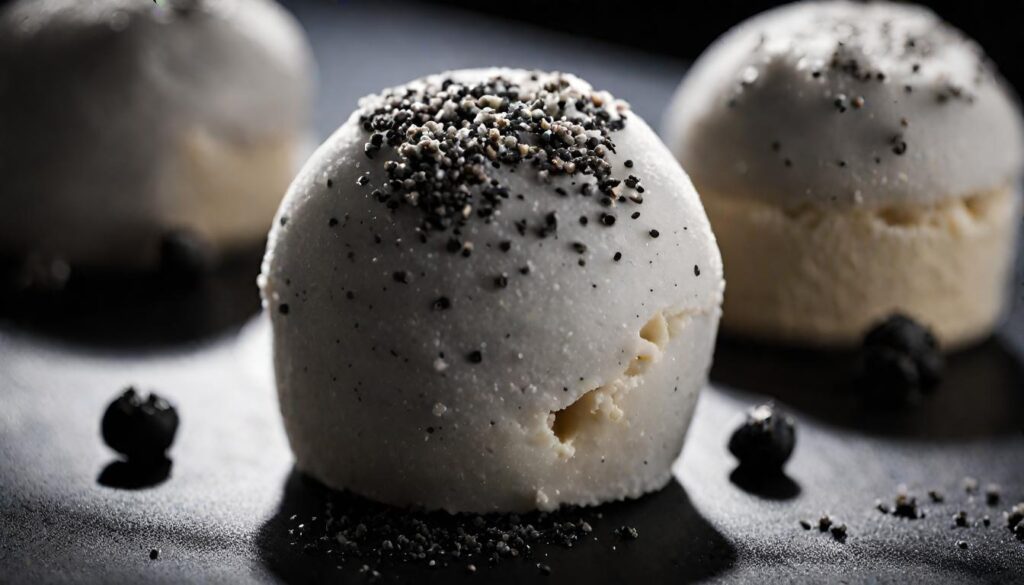
Recipe 6. Black Sesame Symphony Mochi Ice Cream
Step into the world of unique flavors with Black Sesame Symphony Mochi Ice Cream. The nutty essence of black sesame blends seamlessly with the chewy mochi, creating a symphony of flavors.
Ingredients
For the Black Sesame Mochi Ice Cream Dough:
- 1 cup sweet rice flour
- 1/2 cup black sesame seeds, finely ground
- 1/4 cup sugar
- 1/2 cup water
- Cornstarch for dusting
For the Black Sesame Filling:
- 1 cup black sesame paste
- 1/3 cup sweetened condensed milk
- 2 tablespoons honey
Optional Garnish:
- Crushed black sesame seeds
- Edible flowers
- A drizzle of honey
Step-by-Step Instructions
Step 1: Crafting Black Sesame Mochi Ice Cream Dough
- In a mixing bowl, combine sweet rice flour, finely ground black sesame seeds, sugar, and water.
- Stir the mixture thoroughly until a smooth batter forms.
- Transfer the batter to a heat-resistant dish and steam for approximately 20 minutes until it solidifies.
- Allow the black sesame mochi dough to cool before dusting your hands with cornstarch and shaping it into small, round portions.
Step 2: Creating Black Sesame Filling
- In a bowl, mix black sesame paste, sweetened condensed milk, and honey until well combined.
- Let the black sesame filling rest while you move on to the next step.
Step 3: Assembling Black Sesame Symphony Mochi
- Take a portion of black sesame mochi ice cream dough, flatten it in your palm, ensuring it’s dusted with cornstarch.
- Spoon a generous amount of black sesame filling into the center of the mochi.
- Carefully encase the filling with the mochi, sealing the edges to form a sumptuous black sesame-filled ball.
- Repeat until all mochi and filling are used.
- Place the Black Sesame Symphony Mochi in the refrigerator for at least 2 hours to set.
Step 4: Optional Garnish
- Before serving, roll the mochi delights in crushed black sesame seeds for added texture.
- Garnish with edible flowers to enhance the visual appeal.
- Optionally, drizzle a bit of honey for an extra touch of sweetness.
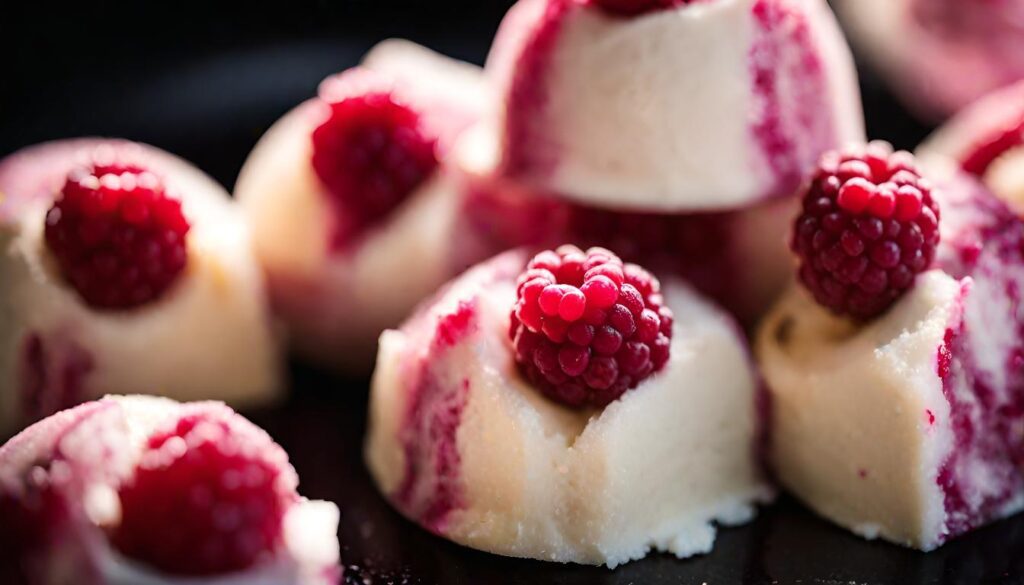
Recipe 7. Raspberry Ripple Mochi Delicacy
Add a touch of tartness to your dessert experience with Raspberry Ripple Mochi Ice Cream. The sweet raspberry ice cream paired with the chewy mochi exterior creates a perfect balance of flavors.
Ingredients
For the Raspberry Mochi Ice Cream Dough:
- 1 cup sweet rice flour
- 1/2 cup fresh raspberries, mashed
- 1/4 cup sugar
- 1/2 cup water
- Cornstarch for dusting
For the Raspberry Ripple Filling:
- 1 1/2 cups fresh raspberries
- 1/4 cup sugar
- 1 tablespoon lemon juice
Optional Garnish:
- Fresh mint leaves
- White chocolate drizzle
- Powdered sugar
Step-by-Step Instructions
Step 1: Crafting Raspberry Mochi Ice Cream Dough
- In a mixing bowl, combine sweet rice flour, mashed fresh raspberries, sugar, and water.
- Stir the mixture thoroughly until a smooth batter forms.
- Transfer the batter to a heat-resistant dish and steam for approximately 20 minutes until it solidifies.
- Allow the raspberry mochi dough to cool before dusting your hands with cornstarch and shaping it into small, round portions.
Step 2: Creating Raspberry Ripple Filling
- In a saucepan, combine fresh raspberries, sugar, and lemon juice.
- Cook the mixture over medium heat until the raspberries break down and the filling thickens.
- Let the raspberry ripple filling cool to room temperature.
Step 3: Assembling Raspberry Ripple Mochi Delicacy
- Take a portion of raspberry mochi ice cream dough, flatten it in your palm, ensuring it’s dusted with cornstarch.
- Spoon a dollop of raspberry ripple filling into the center of the mochi.
- Carefully encase the filling with the mochi, sealing the edges to create a delightful raspberry-filled ball.
- Repeat until all mochi and filling are used.
- Place the Raspberry Ripple Mochi Delicacy in the refrigerator for at least 2 hours to set.
Step 4: Optional Garnish
- Before serving, garnish the mochi delights with fresh mint leaves for a burst of aroma.
- Optionally, drizzle white chocolate over the mochi for an elegant finishing touch.
- Dust with powdered sugar to add a touch of sweetness.
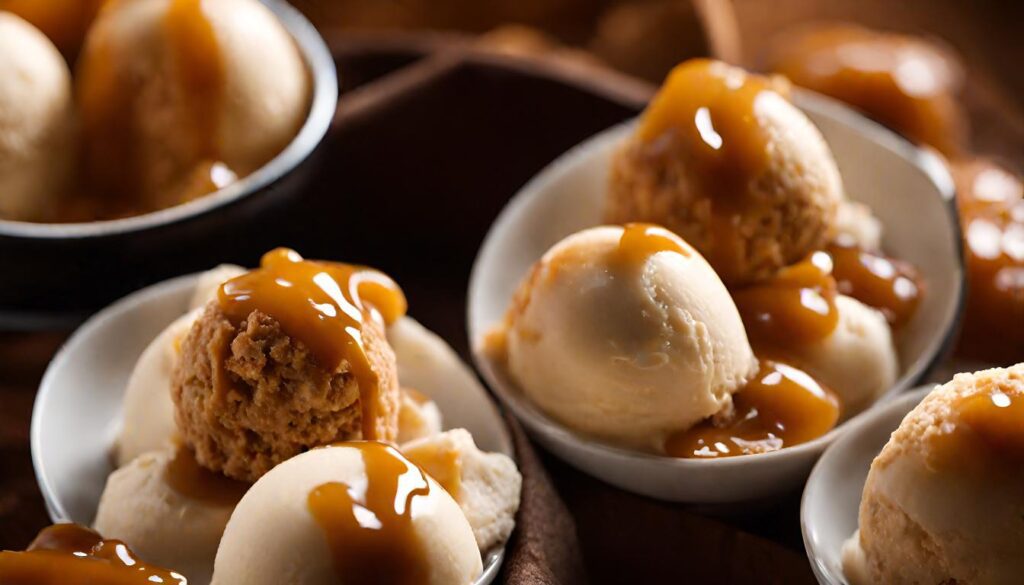
Recipe 8. Caramel Crunch Mochi Extravaganza
Satisfy your cravings for sweetness and crunch with Caramel Crunch Mochi Extravaganza. The gooey caramel interior complements the chewy mochi, offering a textural delight.
Ingredients
For the Caramel Mochi Ice Cream Dough:
- 1 cup sweet rice flour
- 1/3 cup caramel sauce
- 1/4 cup sugar
- 1/2 cup water
- Cornstarch for dusting
For the Caramel Crunch Filling:
- 1 cup caramel candies, crushed
- 1/2 cup toasted pecans, chopped
- 1/4 cup crispy rice cereal
Optional Garnish:
- Additional caramel sauce drizzle
- Edible gold flakes
- Whipped cream
Step-by-Step Instructions
Step 1: Crafting Caramel Mochi Ice Cream Dough
- In a mixing bowl, combine sweet rice flour, caramel sauce, sugar, and water.
- Stir the mixture thoroughly until a luscious batter forms.
- Transfer the batter to a heat-resistant dish and steam for approximately 20 minutes until it solidifies.
- Allow the caramel mochi dough to cool before dusting your hands with cornstarch and shaping it into small, round portions.
Step 2: Creating Caramel Crunch Filling
- In a bowl, mix crushed caramel candies, chopped toasted pecans, and crispy rice cereal until well combined.
- Let the caramel crunch filling rest while you move on to the next step.
Step 3: Assembling Caramel Crunch Mochi Extravaganza
- Take a portion of caramel mochi dough, flatten it in your palm, ensuring it’s dusted with cornstarch.
- Spoon a generous amount of caramel crunch filling into the center of the mochi.
- Carefully encase the filling with the mochi, sealing the edges to create an extravagant caramel-filled ball.
- Repeat until all mochi and filling are used.
- Place the Caramel Crunch Mochi Extravaganza in the refrigerator for at least 2 hours to set.
Step 4: Optional Garnish
- Before serving, drizzle additional caramel sauce over the mochi for an extra layer of indulgence.
- Sprinkle edible gold flakes for a touch of opulence.
- Optionally, serve with a dollop of whipped cream for added richness.
Recipe 9. Pistachio Perfection Mochi Wonder
Elevate your palate with Pistachio Perfection Mochi Wonder. The subtle nuttiness of pistachio ice cream encased in mochi is a sophisticated treat for the connoisseur.
Ingredients
For the Pistachio Mochi Ice Cream Dough:
- 1 cup sweet rice flour
- 1/2 cup pistachios, finely ground
- 1/4 cup sugar
- 1/2 cup water
- Cornstarch for dusting
For the Pistachio Wonder Filling:
- 1 cup pistachio paste
- 1/3 cup sweetened condensed milk
- 1 tablespoon rose water (optional for a floral hint)
Optional Garnish:
- Chopped pistachios
- Rose petals
- A dusting of powdered sugar
Step-by-Step Instructions
Step 1: Crafting Pistachio Mochi Dough
- In a mixing bowl, combine sweet rice flour, finely ground pistachios, sugar, and water.
- Stir the mixture thoroughly until a smooth batter forms.
- Transfer the batter to a heat-resistant dish and steam for approximately 20 minutes until it solidifies.
- Allow the pistachio mochi dough to cool before dusting your hands with cornstarch and shaping it into small, round portions.
Step 2: Creating Pistachio Wonder Filling
- In a bowl, mix pistachio paste, sweetened condensed milk, and rose water (if using) until well combined.
- Let the pistachio wonder filling rest while you move on to the next step.
Step 3: Assembling Pistachio Perfection Mochi Wonder
- Take a portion of pistachio mochi dough, flatten it in your palm, ensuring it’s dusted with cornstarch.
- Spoon a generous amount of pistachio wonder filling into the center of the mochi.
- Carefully encase the filling with the mochi, sealing the edges to create a pistachio-filled wonder ball.
- Repeat until all mochi and filling are used.
- Place the Pistachio Perfection Mochi Wonder in the refrigerator for at least 2 hours to set.
Step 4: Optional Garnish
- Before serving, roll the mochi delights in chopped pistachios for added texture.
- Garnish with delicate rose petals for a touch of elegance.
- Optionally, dust with powdered sugar to add a hint of sweetness.
Recipe 10. Hazelnut Heaven Mochi Magic
Hazelnut enthusiasts, rejoice! Hazelnut Heaven Mochi Magic brings the rich, creamy hazelnut flavor to the forefront, encapsulated in a delightful mochi shell.
Ingredients
For the Hazelnut Mochi Dough:
- 1 cup sweet rice flour
- 1/2 cup hazelnuts, finely ground
- 1/4 cup sugar
- 1/2 cup water
- Cornstarch for dusting
For the Hazelnut Magic Filling:
- 1 cup hazelnut butter
- 1/3 cup honey
- 1/4 cup whipping cream
Optional Garnish:
- Crushed hazelnuts
- A drizzle of chocolate ganache
- Edible gold dust
Step-by-Step Instructions
Step 1: Crafting Hazelnut Mochi Dough
- In a mixing bowl, combine sweet rice flour, finely ground hazelnuts, sugar, and water.
- Stir the mixture thoroughly until a velvety batter forms.
- Transfer the batter to a heat-resistant dish and steam for approximately 20 minutes until it solidifies.
- Allow the hazelnut mochi dough to cool before dusting your hands with cornstarch and shaping it into small, round portions.
Step 2: Creating Hazelnut Magic Filling
- In a bowl, whisk together hazelnut butter, honey, and whipping cream until well combined.
- Let the hazelnut magic filling rest while you move on to the next step.
Step 3: Assembling Hazelnut Heaven Mochi Magic
- Take a portion of hazelnut mochi dough, flatten it in your palm, ensuring it’s dusted with cornstarch.
- Spoon a generous amount of hazelnut magic filling into the center of the mochi.
- Carefully encase the filling with the mochi, sealing the edges to create a hazelnut-filled magic ball.
- Repeat until all mochi and filling are used.
- Place the Hazelnut Heaven Mochi Magic in the refrigerator for at least 2 hours to set.
Step 4: Optional Garnish
- Before serving, roll the mochi delights in crushed hazelnuts for added texture.
- Drizzle a touch of chocolate ganache over the mochi for an extra layer of decadence.
- Optionally, sprinkle edible gold dust for a magical finishing touch.
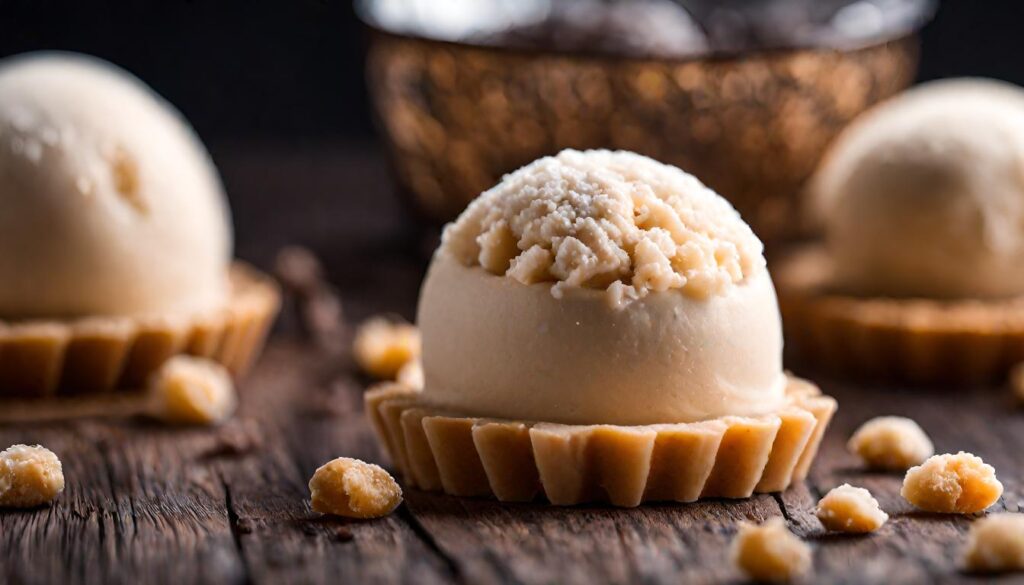
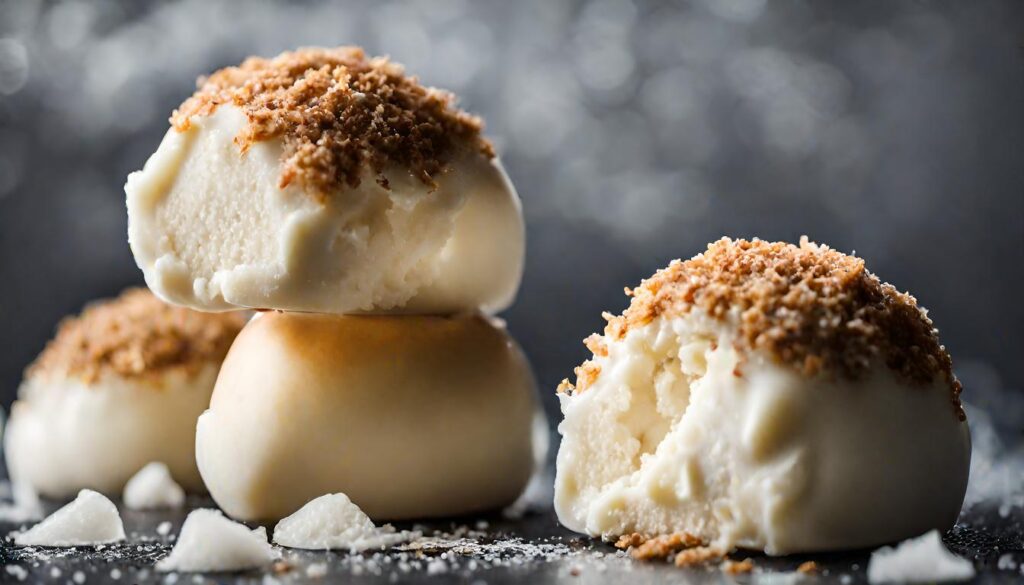
Recipe 11. Coconut Cream Mochi Paradise
Escape to a tropical paradise with Coconut Cream Mochi. The creamy coconut ice cream paired with the chewy mochi exterior is a vacation for your taste buds.
Ingredients
For the Coconut Mochi Ice Cream Dough:
- 1 cup sweet rice flour
- 1/2 cup coconut milk
- 1/4 cup sugar
- 1/2 cup water
- Cornstarch for dusting
For the Coconut Cream Paradise Filling:
- 1 cup coconut cream
- 1/4 cup condensed milk
- 1/2 cup shredded coconut
Optional Garnish:
- Toasted coconut flakes
- Pineapple chunks
- A drizzle of honey
Step-by-Step Instructions
Step 1: Crafting Coconut Mochi Dough
- In a mixing bowl, combine sweet rice flour, coconut milk, sugar, and water.
- Stir the mixture thoroughly until a smooth batter forms.
- Transfer the batter to a heat-resistant dish and steam for approximately 20 minutes until it solidifies.
- Allow the coconut mochi dough to cool before dusting your hands with cornstarch and shaping it into small, round portions.
Step 2: Creating Coconut Cream Paradise Filling
- In a bowl, whisk together coconut cream, condensed milk, and shredded coconut until well combined.
- Let the coconut cream paradise filling rest while you move on to the next step.
Step 3: Assembling Coconut Cream Mochi Paradise
- Take a portion of coconut mochi dough, flatten it in your palm, ensuring it’s dusted with cornstarch.
- Spoon a generous amount of coconut cream paradise filling into the center of the mochi.
- Carefully encase the filling with the mochi, sealing the edges to create a coconut-filled paradise ball.
- Repeat until all mochi and filling are used.
- Place the Coconut Cream Mochi Paradise in the refrigerator for at least 2 hours to set.
Step 4: Optional Garnish
- Before serving, roll the mochi delights in toasted coconut flakes for added texture.
- Garnish with pineapple chunks to enhance the tropical experience.
- Optionally, drizzle a bit of honey for an extra touch of sweetness.
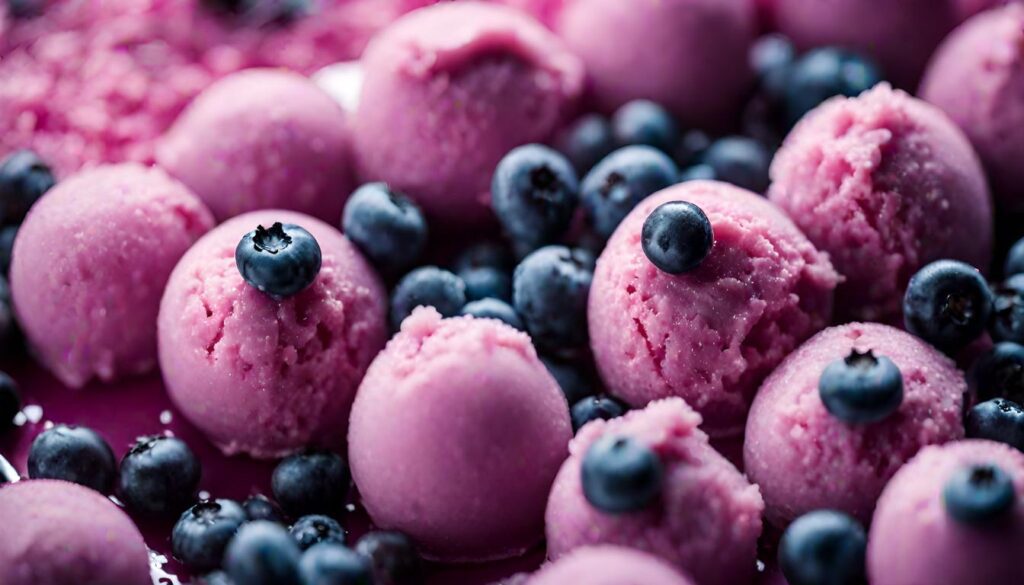
Recipe 12. Blueberry Burst Mochi Joy
Enjoy the fruity explosion of Blueberry Burst Mochi Joy. The juicy blueberry ice cream encased in mochi promises a refreshing and delightful experience.
Ingredients
For the Blueberry Mochi Dough:
- 1 cup sweet rice flour
- 1/2 cup fresh blueberries, mashed
- 1/4 cup sugar
- 1/2 cup water
- Cornstarch for dusting
For the Blueberry Burst Joy Filling:
- 1 1/2 cups fresh blueberries
- 1/4 cup sugar
- 1 tablespoon lemon juice
Optional Garnish:
- Fresh mint leaves
- Lemon zest
- A dusting of powdered sugar
Step-by-Step Instructions
Step 1: Crafting Blueberry Mochi Dough
- In a mixing bowl, combine sweet rice flour, mashed fresh blueberries, sugar, and water.
- Stir the mixture thoroughly until a vibrant batter forms.
- Transfer the batter to a heat-resistant dish and steam for approximately 20 minutes until it solidifies.
- Allow the blueberry mochi dough to cool before dusting your hands with cornstarch and shaping it into small, round portions.
Step 2: Creating Blueberry Burst Joy Filling
- In a saucepan, combine fresh blueberries, sugar, and lemon juice.
- Cook the mixture over medium heat until the blueberries break down and the filling thickens.
- Let the blueberry burst joy filling cool to room temperature.
Step 3: Assembling Blueberry Burst Mochi Joy
- Take a portion of blueberry mochi dough, flatten it in your palm, ensuring it’s dusted with cornstarch.
- Spoon a dollop of blueberry burst joy filling into the center of the mochi.
- Carefully encase the filling with the mochi, sealing the edges to create a joyous blueberry-filled ball.
- Repeat until all mochi and filling are used.
- Place the Blueberry Burst Mochi Joy in the refrigerator for at least 2 hours to set.
Step 4: Optional Garnish
- Before serving, garnish the mochi delights with fresh mint leaves for a burst of aroma.
- Optionally, sprinkle lemon zest for an added layer of citrusy freshness.
- Dust with powdered sugar to add a touch of sweetness.
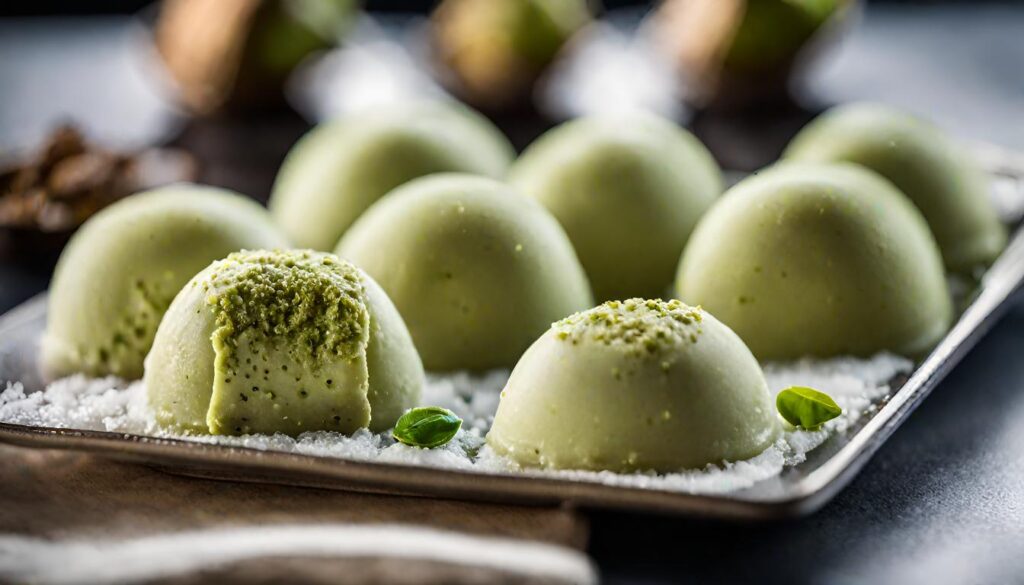
Recipe 13. Green Tea Infusion Mochi Euphoria
For green tea enthusiasts, Green Tea Infusion Mochi Euphoria is a must-try. The subtle bitterness of green tea ice cream harmonizes with the chewy mochi, creating a zen-like dessert experience.

Ingredients
For the Green Tea Mochi Dough:
- 1 cup sweet rice flour
- 2 tablespoons matcha green tea powder
- 1/4 cup sugar
- 1/2 cup water
- Cornstarch for dusting
For the Green Tea Euphoria Filling:
- 1 cup white chocolate, finely chopped
- 2 tablespoons matcha green tea powder
- 1/2 cup heavy cream
Optional Garnish:
- Matcha powder dusting
- Edible flowers
- A drizzle of honey
Step-by-Step Instructions
Step 1: Crafting Green Tea Mochi Dough
- In a mixing bowl, combine sweet rice flour, matcha green tea powder, sugar, and water.
- Stir the mixture thoroughly until a vibrant batter forms.
- Transfer the batter to a heat-resistant dish and steam for approximately 20 minutes until it solidifies.
- Allow the green tea mochi dough to cool before dusting your hands with cornstarch and shaping it into small, round portions.
Step 2: Creating Green Tea Euphoria Filling
- In a heatproof bowl, place the finely chopped white chocolate and matcha green tea powder.
- In a saucepan, heat the heavy cream until it simmers.
- Pour the hot cream over the white chocolate and matcha, letting it sit for a minute before stirring until smooth.
- Allow the green tea euphoria filling to cool to room temperature.
Step 3: Assembling Green Tea Infusion Mochi Euphoria
- Take a portion of green tea mochi dough, flatten it in your palm, ensuring it’s dusted with cornstarch.
- Spoon a dollop of green tea euphoria filling into the center of the mochi.
- Carefully encase the filling with the mochi, sealing the edges to create a euphoric green tea-filled ball.
- Repeat until all mochi and filling are used.
- Place the Green Tea Infusion Mochi Euphoria in the refrigerator for at least 2 hours to set.
Step 4: Optional Garnish
- Before serving, dust the mochi delights with additional matcha powder for an extra burst of green tea flavor.
- Garnish with edible flowers to enhance the visual appeal.
- Optionally, drizzle a bit of honey for an added layer of sweetness.
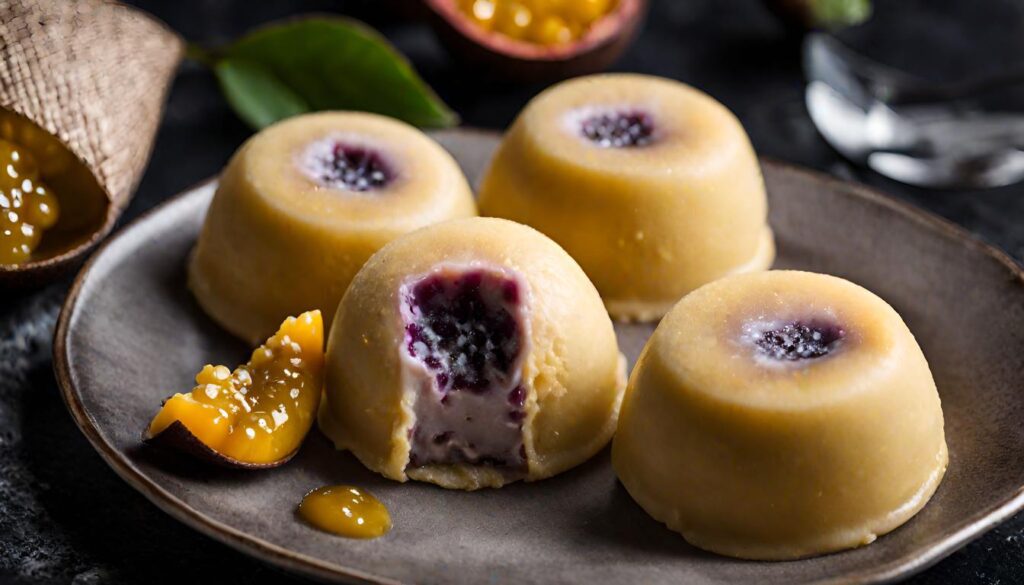
Recipe 14. Passion Fruit Paradise Mochi Fantasy
Embark on a journey of exotic flavors with Passion Fruit Paradise Mochi Fantasy. The tangy passion fruit ice cream within the mochi exterior is a tropical delight.
Ingredients
For the Passion Fruit Mochi Dough:
- 1 cup sweet rice flour
- 1/3 cup passion fruit pulp
- 1/4 cup sugar
- 1/2 cup water
- Cornstarch for dusting
For the Passion Fruit Fantasy Filling:
- 1 cup passion fruit pulp
- 1/4 cup sugar
- 1/4 cup cream cheese, softened
Optional Garnish:
- Passion fruit seeds
- Mint leaves
- A sprinkle of powdered sugar
Step-by-Step Instructions
Step 1: Crafting Passion Fruit Mochi Dough
- In a mixing bowl, combine sweet rice flour, passion fruit pulp, sugar, and water.
- Stir the mixture thoroughly until a vibrant batter forms.
- Transfer the batter to a heat-resistant dish and steam for approximately 20 minutes until it solidifies.
- Allow the passion fruit mochi dough to cool before dusting your hands with cornstarch and shaping it into small, round portions.
Step 2: Creating Passion Fruit Fantasy Filling
- In a bowl, mix passion fruit pulp, sugar, and softened cream cheese until well combined.
- Let the passion fruit fantasy filling rest while you move on to the next step.
Step 3: Assembling Passion Fruit Paradise Mochi Fantasy
- Take a portion of passion fruit mochi dough, flatten it in your palm, ensuring it’s dusted with cornstarch.
- Spoon a generous amount of passion fruit fantasy filling into the center of the mochi.
- Carefully encase the filling with the mochi, sealing the edges to create a fantasy-filled passion fruit ball.
- Repeat until all mochi and filling are used.
- Place the Passion Fruit Paradise Mochi Fantasy in the refrigerator for at least 2 hours to set.
Step 4: Optional Garnish
- Before serving, garnish the mochi delights with passion fruit seeds for added texture.
- Add a touch of freshness with mint leaves for a visual appeal.
- Optionally, sprinkle powdered sugar for an extra hint of sweetness.
Recipe 15. Rocky Road Mochi Ice Cream
Conclude your mochi adventure with the indulgent Rocky Road Mochi Extravaganza. The classic combination of chocolate, marshmallow, and nuts in ice cream form, embraced by a mochi layer, creates a treat that’s pure indulgence.

Ingredients
For the Rocky Road Mochi Dough:
- 1 cup sweet rice flour
- 1/3 cup cocoa powder
- 1/4 cup sugar
- 1/2 cup water
- Cornstarch for dusting
For the Rocky Road Extravaganza Filling:
- 1 cup chocolate chips
- 1/2 cup mini marshmallows
- 1/2 cup chopped nuts (walnuts or almonds)
Optional Garnish:
- Additional melted chocolate drizzle
- Crushed nuts
- Mini marshmallows
Step-by-Step Instructions
Step 1: Crafting Rocky Road Mochi Ice Cream Dough
- In a mixing bowl, combine sweet rice flour, cocoa powder, sugar, and water.
- Stir the mixture thoroughly until a rich, chocolatey batter forms.
- Transfer the batter to a heat-resistant dish and steam for approximately 20 minutes until it solidifies.
- Allow the rocky road mochi dough to cool before dusting your hands with cornstarch and shaping it into small, round portions.
Step 2: Creating Rocky Road Extravaganza Filling
- In a heatproof bowl, melt chocolate chips until smooth.
- Mix in mini marshmallows and chopped nuts, ensuring they are evenly coated with chocolate.
- Let the rocky road extravaganza filling cool slightly while you move on to the next step.
Step 3: Assembling Rocky Road Mochi Extravaganza
- Take a portion of rocky road mochi dough, flatten it in your palm, ensuring it’s dusted with cornstarch.
- Spoon a generous amount of rocky road extravaganza filling into the center of the mochi.
- Carefully encase the filling with the mochi, sealing the edges to create an extravagant rocky road-filled ball.
- Repeat until all mochi and filling are used.
- Place the Rocky Road Mochi Extravaganza in the refrigerator for at least 2 hours to set.
Step 4: Optional Garnish
- Before serving, drizzle additional melted chocolate over the mochi for an extra layer of decadence.
- Roll the mochi delights in crushed nuts for added texture.
- Optionally, garnish with mini marshmallows for a playful touch.
Tips for Savoring Mochi Ice Cream:
- Allow Mochi to Soften: For the best texture, let your mochi ice cream sit at room temperature for a few minutes before indulging.
- Experiment with Pairings: Consider pairing different mochi ice cream flavors with complementary toppings like chopped nuts, chocolate sauce, or fruit compote.
- Create a Mochi Ice Cream Platter: Impress your guests by arranging a variety of mochi ice cream flavors on a platter. It’s a visually appealing and delicious way to enjoy these treats.
Frequently Asked Questions (FAQ):
Q1: Can I make mochi ice cream at home?
A1: While making mochi ice cream at home can be challenging, there are recipes available online for those who wish to try. However, store-bought options offer convenience and a wide variety of flavors.
Q2: Are there dairy-free options for mochi ice cream?
A2: Yes, there are dairy-free and vegan mochi ice cream alternatives available, typically made with coconut or almond milk.
Q3: How long can mochi ice cream be stored in the freezer?
A3: Mochi ice cream can be stored in the freezer for several months. Ensure it is kept in an airtight container to prevent freezer burn.
Q4: Can I find unique mochi ice cream flavors in local grocery stores?
A4: Many specialty grocery stores carry a diverse selection of mochi ice cream flavors. However, you may find a broader range of options at Asian supermarkets or specialty dessert shops.
Conclusion: A Symphony of Mochi Magic
In conclusion, the world of mochi ice cream is a delightful realm filled with a myriad of flavors and textures. Whether you’re a fan of classic matcha or adventurous enough to try passion fruit, these 15 varieties offer a sweet escape for your taste buds. With helpful tips and answers to common questions, you’re now equipped to embark on your own mochi ice cream adventure. Indulge, experiment, and savor the magic of mochi ice cream!
You may also like
Sip into Happiness: 10 Amazing Banana Pudding Milkshake Recipes You Can’t Resist!
Banana Pudding Brownies Extravaganza: 10 Decadent Treats for Sweet Satisfaction!